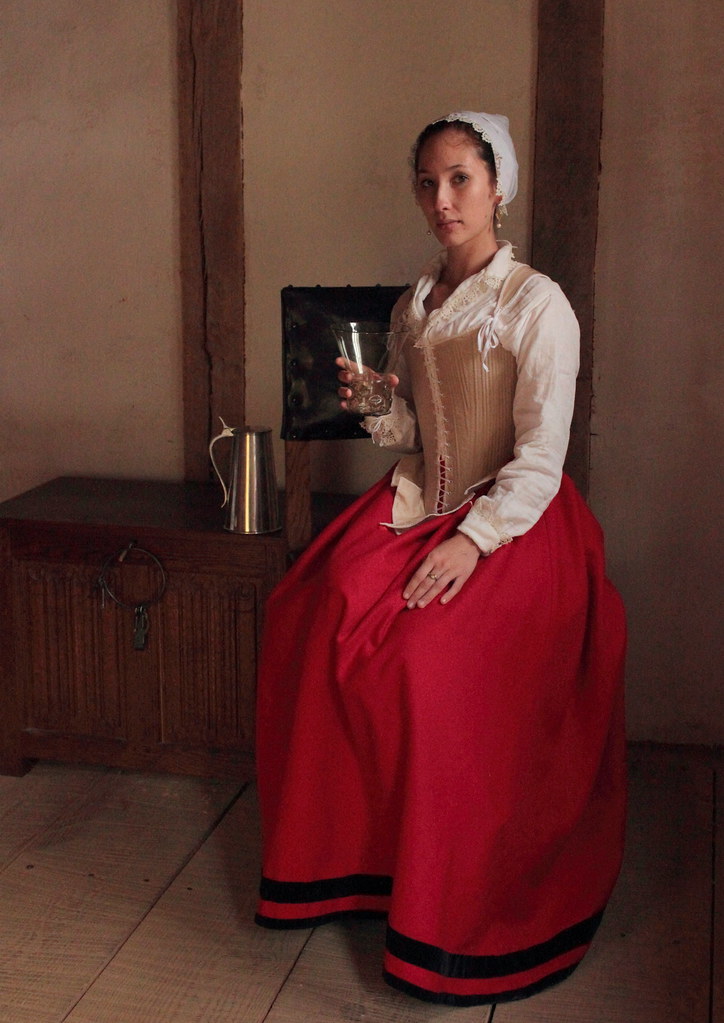
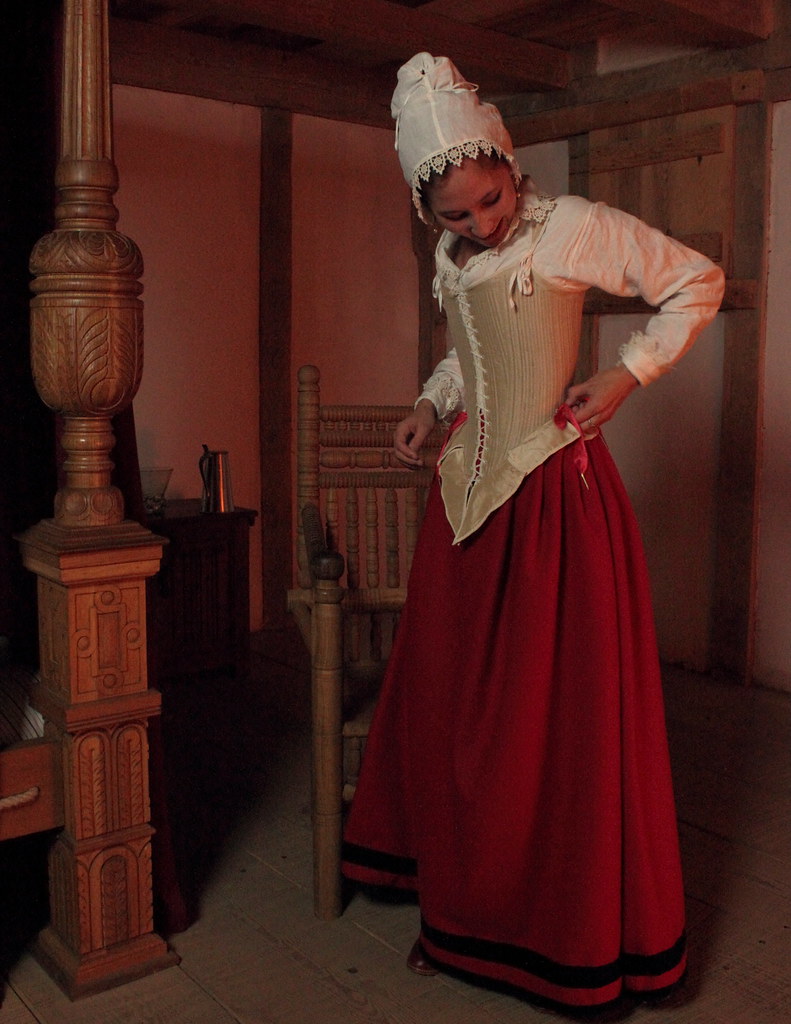
Another post already, can you believe it?! Today I got the pictures from the awesome photo shoot I did with Frederick Scholpp, which I posted a teaser of last week. We had a great time, and it was so fun working with someone who has such a great eye for capturing shots and could perfectly understand my inspiration. Both of us being artists in different mediums, I think we worked really well together!I fully intend to do a separate post on the pair of bodies and smock with construction detail pictures and more historical notes, but for now here are "overview" pictures of how the undergarments looks when worn all together.First is the linen smock, completely hand sewn and trimmed with reproduction lace from The Tudor Tailor. The pattern is an amalgamation of shapes from Patterns of Fashion 4.Next is the petticoat, which is red wool broadcloth bound and guarded with black velvet. The waist is bound with red silk taffeta and worked with eyelets so that it can be pointed to the pair of bodies. Based on a few portraits (particularly the Elizabeth Vernon portrait) and a video of Jenni Tiramani showing a reproduction pair of bodies pointed to a matching petticoat, AND this old but very interesting conversation on this question here, I made the decision to do this bodies-pointed-to-petticoat method. It works wonderfully well for helping to support the relatively heavy wool broadcloth. The points were custom made for me by Francis Classe (available through his etsy shop, and I have a pair for my American Duchess Stratfords as well.The pair of bodies are from The Tudor Tailor, the Elizabeth Vernon style. I can't tell you just how incredibly comfortable these are!! I love them so much... They are silk taffeta, interlined with heavy linen and lined with white linen, boned with reed. More info in the construction post, I promise!All of the materials (smock linen, all threads, wool broadcloth, silk taffeta, linen interlining and lining, silk paduasoy ribbon binding), except for the lace, reed, and points, are from Burnley and Trowbridge!I hope you enjoy. :)


(Michael insisted I use that as the title for this entry...)
So I decided to make a rebato to solve the ruff issues I mentioned previously. The latest Patterns of Fashion was an IMMENSE help, since they have quite a few examples in there.
Rebatos in the period tend to be completely wrapped in silk and gilt thread or wire... which I definitely wasn't crazy enough to do. So I used black thread-covered 21 gauge millinery wire, although I did then wrap every piece by hand with fine gold wire on top of that (some things I am crazy enough to do...).
My darling, wonderful husband cut and shaped the millinery wire pieces, then I wrapped and assembled them. It was really neat to see these crazy pieces of unruly wire come together into something useable! The "spoke" pieces radiating out from the neck are not just decorative; they are central to keeping everything sturdy.
The inner arches are actually one piece of wire that snakes back and forth inside of the outer wire. I thought that was really neat, although it was a pain in the neck to do in practice... But we persevered! The last really difficult part was the out "frill" as I call it. Each of the wire arches supports a particular point of the lace. It took quite a bit of careful measuring to get everything to line up, and I did get off a tiny bit on one side, but it's hard to see. For the most part, they line up perfectly!
And so, I am one piece closer to inadvertently recreating the 1616 woodcut of Pocahontas! I never set out to recreate it, but here I am... Next up will be the loose gown, but probably not for a while... We'll see!


I always seem to underestimate how long it will take me to actually get images in hand after a photo shoot! I've shared some teaser pics on my Facebook, but I thought I would share one of them here to whet your appetites for the big blog post that's coming up on my 17th century undergarments, once I get all of the pictures from our awesome photoshoot.
I've created a Facebook page for my blogs where I'll be posting frequent progress pictures and random musings. I noticed I was posting things on Facebook but not here to the blog because they weren't things I deemed "blog-worthy", but my Facebook friends still found them interesting. I think the blogs will be for big, nicely photographed posts of completed garments, and the Facebook page will be for in-progress shots. https://www.facebook.com/thecouturecourtesan Come find out what I've been up to!


