The story begins back in 8th grade, the day of the graduation dance.
I had found an adorable 20s-esque dress to wear, and I wanted my hair to be appropriately finger waved. I told this to the hairdresser at the beauty school and she looked like she was going to cry. You see, I had no idea, at 13 years old, the kind of time and energy it takes to do proper finger waves. After a few failed attempts (seriously, I can't believe I tortured that poor student stylist), the girl pulled out something I had never seen before: a waving iron.
In a few minutes, there were some waves in my hair, and with a couple well placed and pinned curls and the gift of a flower pin (yes, the stylist felt so bad she couldn't give me the hair I wanted that she gave me a flower pin as consolation) I had pretty darn convincing 20s hair.
That waving iron has stuck with me ever since, and when I started Civil War reenacting, I bought one to give texture and volume to my hair so that I could more easily style it (see here).
Well, almost 10 years later (whoa!) I got to do a 1920s event, so the trusty waving iron came out.
Will this give you perfect, immaculate finger waves?
No.
Will it take a tiny fraction of the time it would have taken you to do perfect, immaculate finger waves but still create a reasonable 1920s style even with long hair?
Yes!
Without further ado, here's my tutorial!
1. Curl a couple pieces of hair with a TINY curling iron. I think mine is 1/2" barrel? The TINY is important. TINY curling irons will also give you great Regency curls without having to use rags or curlers. So invest in one! It's helpful for a lot of periods, like the waving iron. I have bangs, so I just curled my bangs.
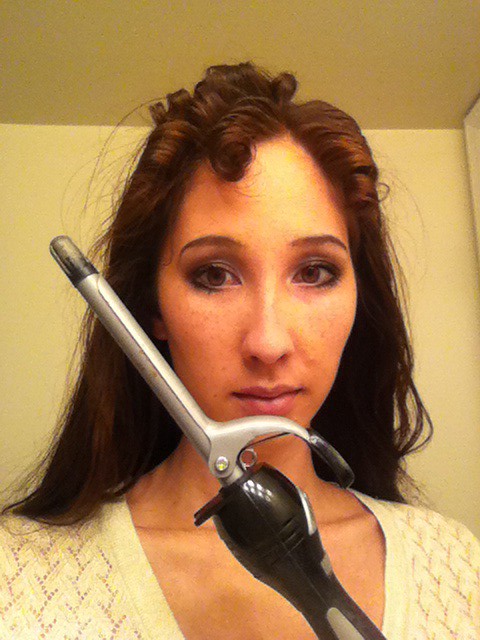
2. Divide your hair in half, top half and bottom half. I put MORE hair in the bottom and LESS on the top. This will be explained later.

3. Braid the bottom half and wind it into a bun at the base of your scull. Try to make the bun more oblong than round. This will also be explained later.

4. Part your hair to the side. And I mean really to the side.
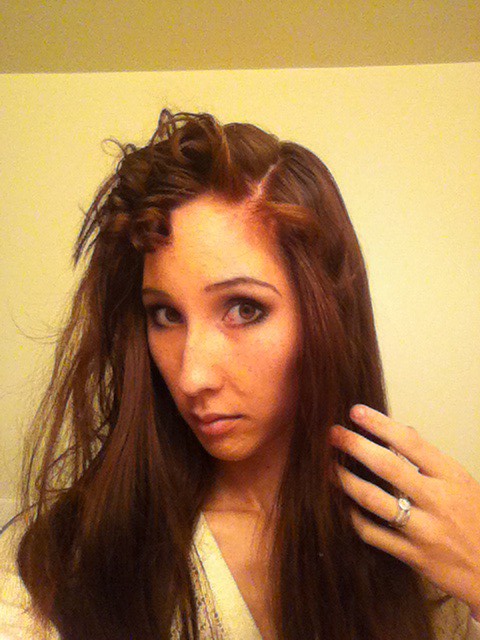
5. Waving iron time! Hopefully you plugged this in before you started your hair because it needs to warm up. I put mine on the hottest setting because I have THICK, STRAIGHT, LONG hair. I have a Bedhead brand, but you can research other brands. This one was only $20 from Target though. Like the TINY curling iron, go for smaller waves in your waving iron (i.e. avoid the word "jumbo"). I think mine has 0.75" waves.
Remember when I said less hair in the top half of your hair sections? That's so you have less to wave! ;-)
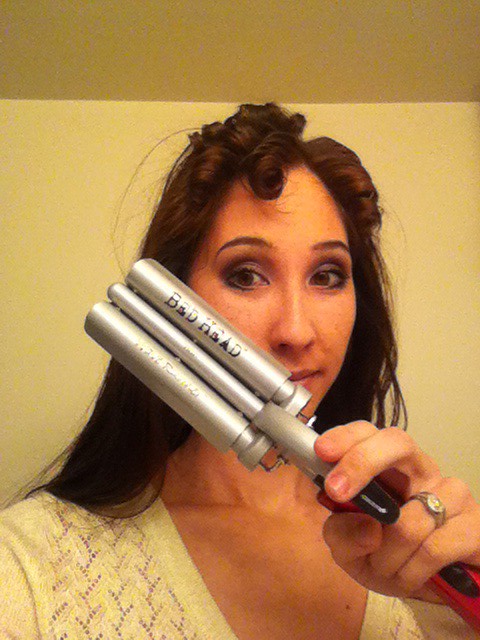

How to use your waving iron:
Unless your hair is only 3 inches long, you will have to use the waving iron a couple times on the same piece of hair, moving down to wave the entire length. Starting at the top, clamp and hold for like... 15 seconds? More? Less? I wasn't paying attention... You'll know how much your hair needs. Then move the waving iron down, RECLAMPING the last "hill" you made with the first set of waves you made. This is really important to make continuous waves in a piece of hair.
HOT TIP: You DO NOT need to wave all of the hair in the side sections. I only waved the very top layer of my hair. If straight hair shows through, you can wave that, but I didn't need to. Only the top layer.
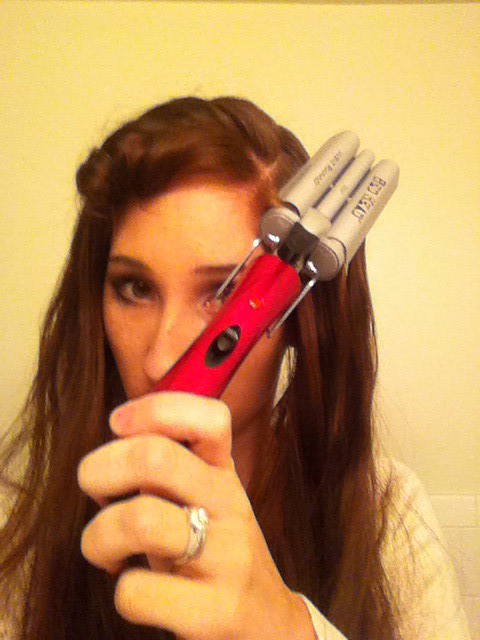
For this style, you don't have to wave the entire length of hair, only to wear your hair hits your jawline.
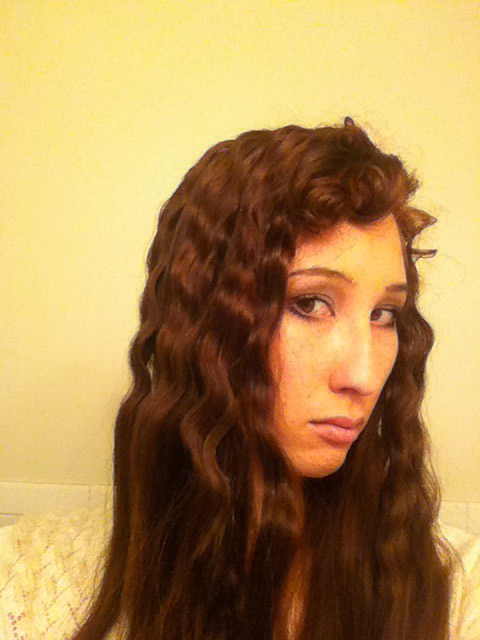
7. Brush out and arrange the curls you did at the beginning. It's easier to do this now.

8. Braid both sides of your hair, starting where the waves stop. Don't braid too tightly at the top. You want to retain the volume in the waved sections. I use the tiny plastic rubber bands.

9. Take one braid and loop it forward. Wind the rest of the braid into a bun that touches/melds with the other bun you made at the very back of your head. If the back bun is more oblong shape, it will be easier for all the buns to meet and look more continuous. Does that make any sense?

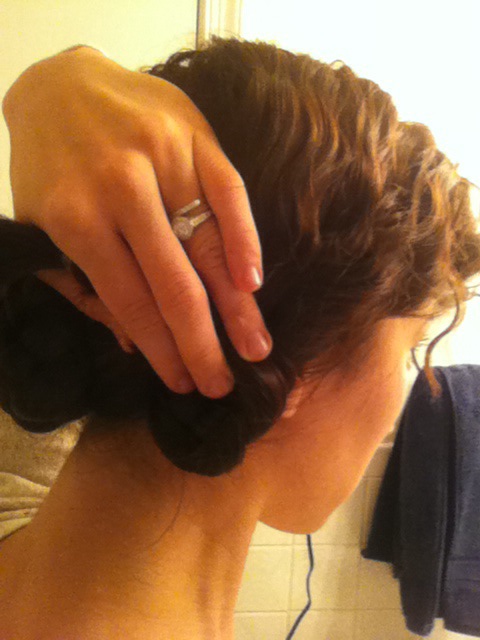
10. Wind and pin the other braid. Pin the bejeezus out of everything.
Here's how the back of my hair looks when it's all been looped, wound, and bunned.
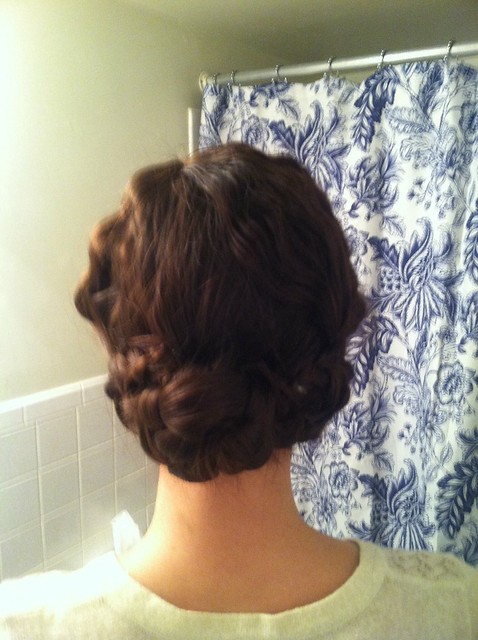
11. Do some finally smoothing, pinning, and hair-spraying of any fly away hairs and other sticky-out-y bits.
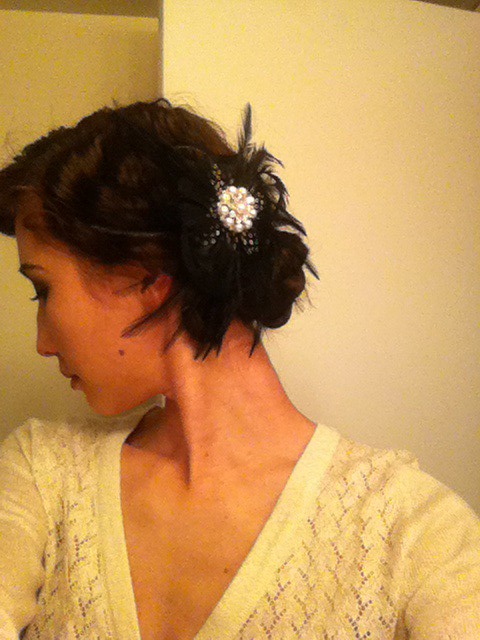
Hopefully you have something like this when you're done!
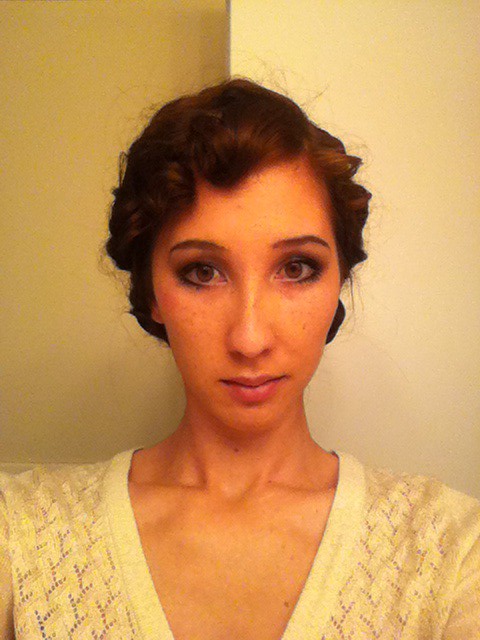


12. Accessorize! A bandeau, a feather, a sparkly bit...

.jpg)
Excellent. Thank you! I'm definitely getting a waving iron.
ReplyDeleteLaaaaa!!! Great tutorial! You did a wonderful job with your 20s do! My hair is short now (think Phryne) so the wave iron would be perfect!! You so totally rock! And your wedding ring is gorgeous!!!
ReplyDeleteMy New Year's Eve was 20's themed and I took my waving iron to the place where we spent it. I ended up as an official hairdresser of the night and almost all of my friends had their waves done this way. It's also pretty useful when you don't have anyone to help you with the fingerwaves (which are too complicated for me anyway).
ReplyDeleteVery helpful! Thanks!
ReplyDelete